Overview of the Hail Damage Insurance Claim Process
Have you discovered unforeseen roof damage due to a recent hailstorm? Are you unsure how to proceed with the Hail Damage Insurance Claim Process? This article details the steps of how to make a hail damage insurance claim so that you can identify roof damage as you file a claim. Instructions on forms and repairs carry out in a timely manner and save time and money as well. The steps must follow along are placed easily now, right down to exactly what you have to do to make a claim to make sure you keep from the coverage on your property and to restore it in no time. Key Takeaways on the Hail Damage Insurance Claim Process -Document the Damage: Take clear photographs of all damage and keep detailed notes. This will be used to support your claim for insurance purposes.–Review Your Insurance Policy: Know what your policy also covers. Take particular note of the deductible, as this will save you work when making a claim.–Contact Your Insurance Company: Report the damage as soon as possible. It is vital for starting the ball rolling on recovery and repair.–Finalization of the Claim: After the insurance adjuster has done its assessment and repair estimates have been received, you review and finalize your claim to make certain all damages were considered and repairs can begin. Extra Tip: Hire a Professional Contractor If you are interested in saving time and keeping the stress of navigating through the Hail Damage Insurance Claim Process you should look into hiring a professional contractor. A qualified professional will help immensely in documenting all the damage that has been done, estimating repairs that must be done in an accurate way, even going so far as to communicate with the insurance adjuster on your behalf. It makes the whole process more streamlined for the convenience of the customer, and there are lighter burdens to shoulder. To find out how the experts can assist you in the best possible way, visit our homepage. Understanding Hail Damage and Insurance Coverage Northern Generations Construction observes that hail storms can lead to significant collateral damage, affecting both roofs and nearby structures. Accidents caused by heavy hail can prompt timely hail damage repairs that prevent further expense. An adjuster often assesses the damage to determine the coverage available on insurance policies. Property owners noticing signs of impacts from severe weather should report accidents that may have caused unseen collateral damage. Hail damage repairs are vital to restoring safety and function, and an adjuster plays a key role in verifying the necessary fixes. The process works to ensure proper compensation and curb excessive expense for homeowners. Insurance policies often cover damage from such incidents, reducing the burden of unexpected expense. A prompt consultation with an adjuster helps clarify if hail damage repairs and collateral damage are included under the policy. Homeowners may then proceed confidently through the streamlined claim process after recording accidents and assessing structural impacts. Steps to File a Hail Damage Insurance Claim Homeowners using the hail damage insurance claim process must document the damage on roofs, garages, and surrounding areas. File a claim, collect repair estimates, meet with the insurance adjuster, receive a payout, and then hire a contractor. These steps help address damages while managing risk and preventing theft effectively. Document the Damage Northern Generations Construction recommends homeowners capture detailed photos and notes of every impacted area, covering roofs, air conditioning units, and nearby structures to support claims related to flood insurance and liability insurance, and to prepare a solid invoice for repair work that strengthens negotiation during the claims process: File a Claim Northern Generations Construction explains that filing a claim for hail damage requires homeowners to document every detail clearly and remain organized, ensuring that roof insurance and insurance covers align with the insurance cover provided by the policy. This approach helps secure a hail damage claim that addresses both immediate repair needs and any potential structural issues, supporting a smoother process for homeowners. Collect Repair Estimates Northern Generations Construction advises homeowners to gather repair estimates that detail the impact of storm damage, ensuring any issues with a hail damage roof or accidental fire damage are clearly noted. Experienced professionals highlight that precise estimates help determine if the policy covers repairs before damage escalates into a total loss, providing peace of mind and a smoother claim process. Meet With Your Insurance Adjuster When meeting with an insurance adjuster, homeowners are advised to organize all documentation and ask key questions about their hail damage roof insurance claim process and homeowners insurance policies; effective communication with insurance companies ensures accurate handling of hail damage claims: Receive a Payout Northern Generations Construction explains that after proper documentation, the payout represents the actual cash value of roof damage insurance claims, serving as a sound investment for property repairs. Homeowners often find relief knowing that the process accounts for damages not only to their roof but also integrates factors like the impact on a vehicle, ensuring clear understanding of the compensation offered. Hire a Contractor Northern Generations Construction advises the homeowner to secure a reliable roofing contractor who specializes in roof hail damage repairs after initiating their hail damage insurance claim. They recommend providing your email address to facilitate prompt communication and scheduling of detailed inspections and estimates. Trusted experts work with homeowners to ensure repairs meet quality standards while preventing further damage to the property. Identifying and Repairing Hail Damage on Your Roof Northern Generations Construction clarifies that thorough visual inspections help spot signs on roofs, like cracked asphalt shingle and damaged tree areas near a condominium. They highlight clear indicators of hail damage and review repair options, from DIY fixes to professional work. This insight benefits personal finance and pet insurance planning during storm recovery. Visual Inspection Approaches Homeowners must carefully inspect their roofs after a storm, paying close attention to signs of damage on metal surfaces and other vulnerable areas, as careful visual inspections are key for a successful roof insurance
Elementor #6149
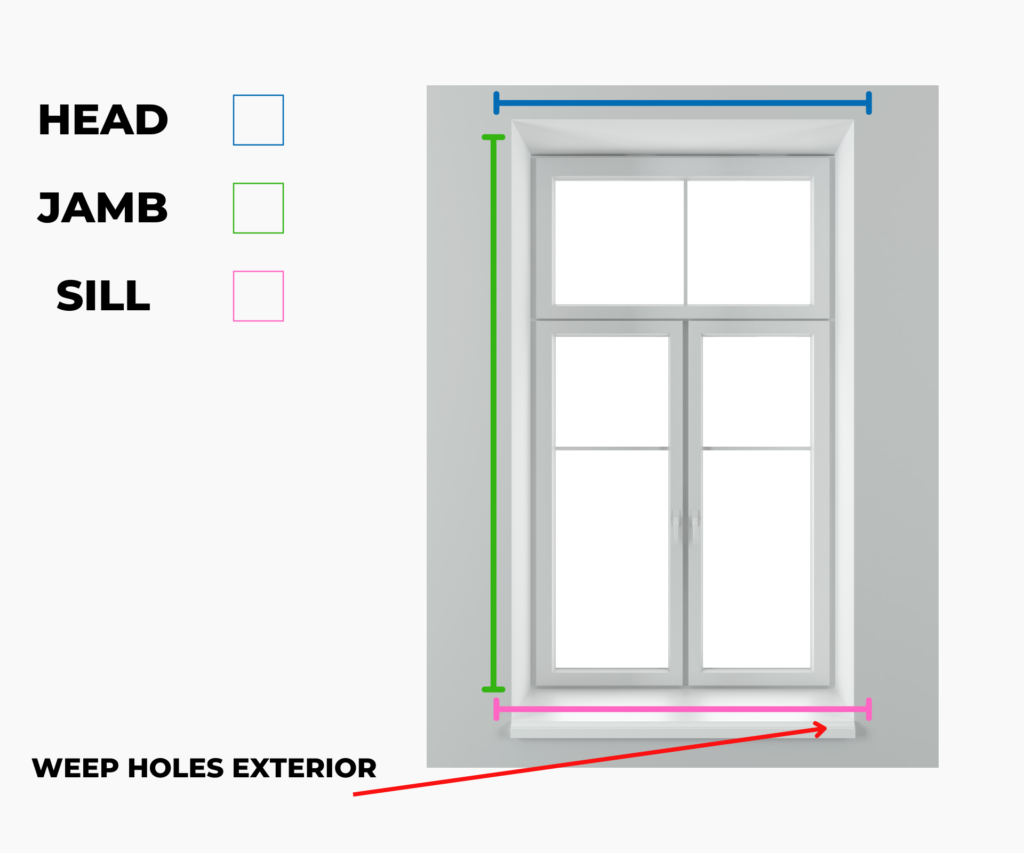
How to Measure Replacement Windows The most exact measurement is necessary so that the new windows, particularly if considering replacement basement windows sizes or smallest double hung window, fit precisely. This quick guide summarizes all the crucial measuring steps for the correct installation of windows, thus saving you time and needless expenditure. Metal tape measure Notepad and pencil Level (optional but recommended for accuracy) What Are the Parts of a Window Frame? Head The head is the uppermost board of the window frame; it’s crucial to measure from edge to edge at the top of the frame. This allows you to estimate the proper width of the window, vital when considering Andersen window sizes and prices or 36 x 36 sliding window replacement.Jambs The jambs are the sides of a window frame.; Importance: Measure each jamb to assess window height. Include both the left and right jambs for a correct overview of the heigh Sill The sill is the lowermost board of a window frame that generally supports the weight of the window.: Checklist for Measurement: Do the height measurements from the top of the sill of the window to the head and make sure the sill is level. Apron This is a decorative piece located just beneath the sill from inside the apartment.; Role: This is usually not part of the structural measurement but important for aesthetic value in relation to the overall window installation. Weep Holes These are small openings made in the outer sill of the window to let water flow out.; Importance: This is important to know so that, after installation, the weep holes are not blocked; otherwise, this can cause water damage and shorten the service life of your window. How to measure a Window for Replacement Precise measurements are critical to ensure that the new windows fit perfectly into the existing openings. Measuring Window Width Step by Step: From jamb to jamb, measure the width of the top, middle, and bottom of the window opening. Always take the smallest of the measured width to ensure a proper fit. especially critical when dealing with custom sizes like 36 x 48 window replacement or 24 x 48 window replacement. Measuring Window Height Measure from the bottom of the sill to the head of the left, center, and right side of the window and take the smallest height for a snug fit. Special Considerations Measuring for Storm Windows Special Considerations: Include the entire window opening and check for any additional space needed for installation hardware. Measuring for Window Screens Consider the full window opening and check for extra space to be allocated for installation hardware.how to measure for replacement vinyl windows? Measuring casement windows For casement windows, measure the width and height from the inside edges of the window frame. Ensure the window is fully closed to accurately capture the dimensions needed for a perfect fit replacement. Key Differences When Measuring for Vinyl Windows When measuring for replacement vinyl windows, it is important to allow for their thermal expansion and contraction due to temperature changes. Therefore, provide about a 1/4″ clearance on all sides to allow for this expansion. Before you do anything with measuring, it would be wise to check your manufacturer’s installation guidelines for specific requirements, like clearances and add-ons Expert Tips for Measuring Windows Measure either the existing screen or the area it will be going into. The case is different if it covers an area where no screen exists; measurement in this case will be according to the area the screen will fit into, with allowance for the frame Double-Check Everything Always check your measurements-at least twice. This reduces mistakes and the likelihood of ordering windows that are a size too small or large. Take Your Time Don’t rush the measurement process. Do not be in haste in taking sizes. Take time, this will save you from a lot of hassles and pay off some extra cash. Don’t Cut Corners Guidance: Be thorough in measuring all parts of the window, including the depth, to ensure that the new windows can be installed properly without modifications. Measure for Depth Importance: Measuring the depth from the highest point of the window sill to the innermost part of the window opening is crucial for flush installation. Always check your measurements-at least twice. This reduces mistakes and the likelihood of ordering windows that are a size too small or large. FAQ: Measuring for Replacement Windows Do I Need to Remove Trim to Measure for Replacement Windows? No, trim need not be removed for replacement window measurements. Measure inside the existing frame between the jambs (sides of the window) without affecting the trim. Do Window Sizes Include the Frame? No. Standard window sizes typically refer only to the glass along with the very immediate holding structure surrounding it; the measurement excludes the outermost frame. In the case of ordering replacement windows, take care in focusing on the dimensions of the glass and core frame fitting into the existing opening. Where to Get Odd Size Replacement Windows? Odd-sized replacement windows can generally be ordered through specialized window companies providing custom window solutions. Provide exact measurements to them, and they can then make a window fitted to your specifications. Other related window blogs
Replacing Old Windows

2025 Guide to Replacing Windows in Older Homes In this article, we will be going over the average cost of new windows in 2025 so you can make informed decision. We will go through the costs related to window replacement, analyzing average costs by type, and tips on saving expenditures during the process. We will discuss the advantages of energy-efficient windows and how they impact the market value of a home. By the end, you shall have a clearer understanding of window replacement costs and be better placed to select your project company. Choosing the Right Replacement Windows for Your Old House Signs It’s Time to Replace Your Old Windows Many homeowners don’t really realize that it is time for the replacement of their windows until it is late. Visible drafts chilling home conditions, increased energy bills because of failing windows, visible decay-seen as rotting frames or broken panes-show such signs that this may be urgent. Such signs are not only annoying; they point to huge losses of energy and structural problems likely to cause even bigger problems as time goes on. How to Choose Windows That Maintain Your Home’s Historic Charm When updating windows in a historic home, be narrowed by both function and aesthetics. Replacement windows that mimic original styles can maintain or even add to the historical charm of your home given. Find window styles and materials resembling the originals with wood frames and single-pane glass, and check with custom manufacturers who specialize in historical reproductions. Many local Milwaukee artisans are capable of providing insights and solutions that big box stores cannot. Benefits of Replacing Windows in Historic Homes Boost Energy Efficiency with New Wood Windows Modern technologies can render the energy efficiency of your home a big time up without ruining its historic character. Features of new wood windows include the inert gas fill method and the use of low-E coatings. Designed to look just like a traditional window, they do far better in terms of thermal performance. In short, heating bills would be lower in a city like Milwaukee during the cold Winter months and one would keep much cooler in the hot summer turns Design Options for Replacement Windows in Historic Properties In Historic Properties A good design is crucial in restoring the authenticity of your historic Milwaukee home and making it more valuable and appealing. When you’re choosing replacement windows, consider options that feature period-appropriate mullions frame designs, and even historically accurate hardware. Manufacturers who offer customization can help you match nearly any historical detail, like ensuring the new windows look as if they’ve always been a part of your home. Window Replacement Options for Old Houses Selecting the Best Material for Longevity and Aesthetics In Milwaukee’s variable climate, your windows’ material can impact their longevity and aesthetic appeal. Wood windows are the most historically correct for historic homes; it is the most genuine looking and can be painted or stained to match existing woodwork. There is, however, some maintenance to prevent decay on wood. Vinyl and fiberglass can last long and need little maintenance but matching them to the historic aesthetic is a bit difficult. Each material has its pros and cons, based entirely on your own needs and the local climate considerations. Why Wood Windows Are a Top Choice for Historic Homes Wood has always been the desired material for windows because of its natural beauty and versatility. It can easily follow the design of any opening, and it could easily have a finish that would be completed in accordance with the exact mode of a given historical period. Also, being naturally insulative, it’s very effective in keeping an old house temperate-that may, through time, certainly build up to be quite drafty construction. Practical Tips for Window Replacement in Historic Homes How to Replace Windows in an Old House Sunroom Replacement of windows in sunrooms takes on special consideration, as it is even more so the case in old homes of Milwaukee City. Match the style and ensure resistance to elements. Select windows that will minimize UV rays to extend the life of furniture and floor coverings. Also, look for frames that will withstand humidity and the vagaries of temperature; you’ll not regret the long-term investment. How to Replace a Window in an Old House To replace a window in an old Milwaukee house, proceed with caution and carefully remove the window. Make precise measurements of the aperture, select a window that has an almost perfect or exact fit. Use shims to ensure a level and plumb installation. Caulk and insulate around the frame for energy efficiency. The original look is important, so when you choose a window, pick accordingly to the home’s historic character. How to Preserve the Design Integrity of Your Historic Home To preserve the design integrity of a historic home means attention to detail. Rely on imitation of original windows. Depending on the nature of your home’s period, this may mean ordering custom windows that resemble its original features. Consult local historians or architects who work with historic properties to make sure you do not make choices that diminish the heritage of the home. Steps to Replace Windows Without Compromising on Style Your window replacement project should not interfere with your home’s historic style, so bring in experienced professionals who will understand the nuances of historic window design. Use materials that closely imitate the old but allow since they involve modern window technology. Such small points as finish and hardware may make a great difference in wardrobe life consistency in your environment. Practical Tips for Window Replacement in Historic Homes How to Replace Windows in an Old House Sunroom Replacement of windows in sunrooms takes on special consideration, as it is even more so the case in old homes of Milwaukee City. Match the style and ensure resistance to elements. Select windows that will minimize UV rays to extend the life of furniture and floor coverings.
diy window replacement
DIY Window Replacement: Pro Tips for Affordable Installation key Takeaways Introduction to Replacement Windows: Information on how many kinds of windows there are and which windows would work best in your home. Tools and Materials: These are what you will expect to need to carry out your window replacement. From Step 1 to Last: Instruction step by step on how a window is removed and replaced. Professional Help: Determining when it is better to call a professional than do it yourself. Budgeting for Window Replacement: Some thoughts on how to budget for your window replacement. Local Considerations: Make sure that local building codes and ordinances are satisfied for your project. DIY Window Installation & Replacement One of the best ways to change up the aesthetics of your home is to replace windows by yourself. With this guide, you should know what you need for the process of window replacements in your home then get started in reinventing and upgrading your personal space without burning a hole in your pocket. Why DIY? Cost-Cutting: Save on labor costs that would occur if a professional were hired for the installation by doing the work yourself.Customization: Incorporate into your home interior and select windows that cater to the design of the house and your own satisfaction.Satisfaction: Achieve the sense of accomplishment and satisfaction that comes upon the completion of home improvements by yourself Choosing the Best Windows for Window Replacement Choosing the correct windows will make or break your window replacement job. These are issues you should consider to make a sound decision. Double-hung windows are functional, easy to clean, and good for almost any type of room. Casement windows offer ample airflow and an unobstructed view, good for kitchens and bathrooms Picture windows operate as ‘giant views,’ allowing maximum natural light into rooms for which ventilation is not crucial, such as living rooms. Vinyl windows: strong, somewhat less maintained, and quite efficient. Design Compatibility Ensure the window style complements the architectural design of your home to boost curb appeal Tools and Materials Needed for DIY Installation Tools Required: Utility Knife Power Drill Screwdriver Set Putty Knife Spirit Level Measuring Tape Materials Needed: Correctly sized Replacement Windows Silicone or Latex Caulk Expanding Foam Insulation Window Flashing Appropriate Screws Shims Step-by-Step Guide to Replacing Your Windows Preparing Your Old Windows for Removal Remove that old window by scoring around the frame with a knife. Take care to pry out the window frame gently. In practical terms, take extreme care with the glass and dispose of every fragment. How to Install New Windows Yourself To properly fit your new window, make sure the frame does not protrude through the rough opening, does not bend during installation, or push out of shape. Use screws to secure in place and seal with caulk. Check for drafts before finishing. When to Consider Professional Help If a large project is in-store, or in cases in which structural changes may be needed, we suggest the hiring of a professional window installation service. other related blogs Frequently Asked Questions Can I replace windows myself? Window replacement costs are influenced by several factors, including the size and number of windows, frame material (vinyl, wood, or aluminum), glass type (single, double, or triple-pane), energy efficiency features, installation complexity, and labor rates in your area. Brand and customization options also affect pricing. Can you buy Andersen windows and install yourself Energy-efficient windows reduce heating and cooling costs, improve comfort by minimizing drafts and temperature fluctuations, block harmful UV rays, and enhance home value. They also contribute to environmental sustainability by lowering energy consumption and reducing carbon footprints. Where to buy replacement windows DIY Yes, you can save money when replacing windows by comparing quotes from multiple contractors, choosing energy-efficient options for long-term savings, considering vinyl frames instead of wood, opting for standard sizes rather than custom, and timing your purchase during off-peak seasons or sales periods. Is it cheaper to replace your own windows? Yes, you can save money when replacing windows by comparing quotes from multiple contractors, choosing energy-efficient options for long-term savings, considering vinyl frames instead of wood, opting for standard sizes rather than custom, and timing your purchase during off-peak seasons or sales periods. Window replacement costs are influenced by several factors, including the size and number of windows, frame material (vinyl, wood, or aluminum), glass type (single, double, or triple-pane), energy efficiency features, installation complexity, and labor rates in your area. Brand and customization options also affect pricing. Energy-efficient windows reduce heating and cooling costs, improve comfort by minimizing drafts and temperature fluctuations, block harmful UV rays, and enhance home value. They also contribute to environmental sustainability by lowering energy consumption and reducing carbon footprints. Yes, you can save money when replacing windows by comparing quotes from multiple contractors, choosing energy-efficient options for long-term savings, considering vinyl frames instead of wood, opting for standard sizes rather than custom, and timing your purchase during off-peak seasons or sales periods. Yes, you can save money when replacing windows by comparing quotes from multiple contractors, choosing energy-efficient options for long-term savings, considering vinyl frames instead of wood, opting for standard sizes rather than custom, and timing your purchase during off-peak seasons or sales periods.
Types Of Commercial Roofing Systems

Commercial Roof Types: Exploring Roof Systems and Materials Table of Contents Add a header to begin generating the table of contents Types of Commercial Roofing Systems Common Types of Commercial Roofs Commercial roofing system selection is imperative; besides safeguarding your commercial properties, it also determines the maintenance costs and provides energy efficiency. The following is a rundown on the most common commercial roofing systems Understanding Commercial Roof Configurations An Overview of Commercial Roof Types The configuration of commercial roofs is important in making a selection of which kind of system to use. Roofs can be generally categorized into Low Slope Roofs: : Low-Slope Roofs: Most commonly found in commercial buildings such as warehouses and retail centers, these roofs often utilize EPDM, PVC, and TPO roofing materials to achieve excellent coverage and performance. Steep Slope Roofs: Steep-Slope Roofs: More common to the residential yards but applicable to selected commercial properties, this roofing employs metal. shingles, or tiles, providing a pleasing look. Steep-slope roofs usually consist of three parts: waterproofing, roof decking, and support or the framing structure Types of Single Commercial Roofing Systems The Purpose and Uses of Single Ply Single ply roofing systems have grown increasingly popular in recent decades. They are loved for their incredible flexibility and durability. Materials include TPO, PVC, and EPDM. They are lightweight and fashioned as a single layer, which is an advantage regarding installation-type on some designs or approaches, which takes the labor costs another notch lower. There are two common types of single-ply membranes: Thermoplastic Membranes: These membranes often include TPO and are particularly appreciated due to their weldability by heat and high degree of reflectivity, hence contributing to significant reductions in cooling costs. Thermoset Membranes: Include EPDM, which ranks high in resistance to ultraviolet light and weathering and is aptly used for areas with very harsh environmental conditions. TPO (Thermoplastic Polyolefin) PO (Thermoplastic Polyolefin) TPO has gained a wide reputation for low-slope commercial applications in North America. TPO sheets are reinforced with heat-welded seams that provide leak resistance. TPO is a low-cost roofing membrane that offers a number of installation options: mechanically attached systems, adhered systems, and ballasted roofs PVC (Polyvinyl Chloride) PVC (Polyvinyl Chloride) Underground PVC roofing has many valuable layers with polyester as the main reinforcement. These roofs are hot welded, which provide neatly sealed seams that protect against UV rays and mechanical damage at a cost. It has flexibility, is easy to install, and has a welding property that makes for seamless connections between sheets. Another quality of PVC is that it is long-lasting and fireproof EPDM Roofing EPDM Roofing-The Ethylene Propylene Diene Monomer-is a synthetic rubber known for its very good durability and elasticity, thus making it particularly very effective against the sun and decay through ozone. The low price combined with excellent life expectancy makes it one of the most favored membranes in commercial roofs. Built-Up Roofing Systems Built-Up Roofing Systems (BUR) Built-up roofing has continued to be the mainstay for its durability over many decades. It consists of multiple layers of tar applied over the felt roofing, as is manufactured for roof coverings. Multiple layer built-up systems should be preferred in climates where the temperature is greatly fluctuated. Metal Roofs Metal roofs are admired for their attractiveness, efficiency, and durability. Installing metal roofs is possible on low-slope and steep-slope roofs alike, and they are made from materials like aluminum or copper, and steel. Liquid Applied Roofing Use of liquid applied roofing is most advantageous on intricate or difficult surfaces where traditional sheets may not be feasible Roof Coating Systems Roof coatings systems are installed over an existing roofing system to augment the life of the roof by protecting it against the rigors of weather, UV rays, and mechanical damage. There exists a plethora of coating materials, with silicon and acrylic being the most conventional ones; silicon and acrylic coatings are especially good for metal roofs, providing energy efficiency improvements. Green Roofs Green roofs offer not only aesthetic and environmental benefits but also better insulation and decreased effects of heat through urbanization. These systems are vegetative layers that, in one way or another, assist the management of rainwater and improvement of insulation. Photovoltaic (PV) Solar Panels Integrating photovoltaic panels with the roofing systems effectively convert the roofing into a source of power generation, adding thus long-term saving in the cost of useful work as well as environmental benefits particularly in sunny areas. Steep Slope Roofing Although less common in commercial applications, such systems find usage commonly in buildings where aesthetics are paramount, such as hotels or institutional buildings. The materials for steep slope roofs cover a broad spectrum ranging from shingles and tiles to metals and slates, offering the designers a solid set of choices. Insulation & Cover Boards Adding insulation and cover boards to enhance thermal performance will deliver all-important energy savings to a building. Adding insulation is especially effective when roofs are replaced since these updates ensure compliance with current energy codes while dramatically reducing heating and cooling costs. Previous PostNext Post
Average Cost of New Windows: Window Replacement Cost

Average Cost of New Windows: Window Replacement Cost 2025 In this article, we will be going over the average cost of new windows in 2025 so you can make informed decision. We will go through the costs related to window replacement, analyzing average costs by type, and tips on saving expenditures during the process. We will discuss the advantages of energy-efficient windows and how they impact the market value of a home. By the end, you shall have a clearer understanding of window replacement costs and be better placed to select your project company. Key takeaways Price point: Usually, new windows can range from $350-$700 each, depending on material, dimension, or brand. Money-saving Tip: Replacing several windows at once-a dozen, will be less expensive than replacing them one at a time. Materials & Cost: The costs increase with the use of premium materials and more large sizes. New Window Price: An average we have found that it cost 350 -450 to install a new window. Understanding the Costs of New Windows Important Factors for Window Costs For new windows to be put into a house, consideration has to be given to different cost factors, the blending of which can make a big difference in your budget. The major player here is the material of the windows; choices may vary from low-priced vinyl indeed to high-priced wood or modern fiberglass. Bigger the window, higher would be its price, as more material and labor will be required. The brand also plays a great role in this equation since established brands often price high because of their established market position and perceived quality. Understanding these facts enables homeowners to optimize their decisions in balancing aesthetic features with budgetary realities. On Average, New Windows Cost The investment in new windows usually is around $300 to $700 per window with an average being 350, when professionally installed, though it can be higher for advanced features like greater energy efficiency or custom designs. While many people think that the initial high cost of quality energy-efficient windows sounds higher, in fact, they may be money savers in the long theoretical run through reduced heating and cooling costs. To budget these expenses is to evaluate immediate costs versus long-term savings, so that the homeowners know for sure what costs they are ready to incur upfront, along with expectations for possible reductions in energy costs. Cost Breakdown for Replacement Cost to Replace a Single Window It can be more challenging to deal with the costs connected with replacing a single window. You could, of course, pay around $150 for the simpler installations of a window with base-grade materials, but it could just as easily jump to over $800 for the special, high-quality-type window. The design of the window is always another concern, whether it is double-hung or casement. The height at which the window is situated will affect its cost because of the work and costs of installation. Consider getting truly several bids from several contractors for the best way to get a good mix of price, quality, and service. Cost to Install Multiple Windows Replacing multiple windows at once usually is less expensive and logistically easier. In general, the price for a project of 12 windows is estimated to be about $3,600 to $8,400, again depending on the materials, the choice of windows, and the code and labor involved. Discounts on the part of contractors are often projected as they can save time and facilitate their work. When homeowners or houses are concentrated on an entire project, one may sometimes benefit from some discount of this nature. Homeowners should ask installers or contractors about any discount from price and ask for several quotations from different service providers to take maximum advantage in terms of lower prices. Window Replacement cost by window type Single-hung windows The typical case for single-hung windows shows that they are among the most budget choices available for homeowners looking to replace their window styles. The prices for singles range closer to the lower extremes of the cost bracket, and that has made it very popular for bedroom and other spaces that require energy efficiency. Often, we suggest using single-hung windows for our clients in resolving their financial obligations on their credit card bills, but still caring for the home insulation properties. While considering the replacement of single-hung windows, water resistance and general energy effectiveness come to mind. When we see an application of modern low-E-coated single-hung windows today, we have realized just how effectively they can check heat transfer, thus minimizing energy costs. We can say from our own experience that these kinds of windows perform best for moderate climate regions, offering balanced economies versus performance. Double-hung windows Frames that are constructed with double-hung windows provide very good versatility, making them an all-time favorite in homes seeking to harmoniously blend beauty with functionality. They offer the most cost-effective solutions for homeowners who want to make homes more energy efficient while still meeting budgetary constraints: Excellent mechanical controls for attaining optimal ventilation that will keep use of air conditioning systems at a minimal level. Then moving on to my observance: I have found casement windows always to vary in the range of price, having a more elevated average cost in comparison with most window styles that feature complicated mechanisms for enabling higher energy efficiency. They are among the best for garden and basement applications, allowing for ample ventilation and gorgeous vistas. Allowing the glass frame is not just about aesthetics; when including the costs, your brand, type of glass, and size come into play-and all of these, of course, exert considerable control over the overall price. Casement windows The installation of casement windows entails a higher window replacement cost than other styles in light of their complicated operation. They are great for gardens and basements because they let in a lot of ventilation and good views. Furthermore, we’ve paid attention to the brand, glass type, and size factors that lead to variations in price.
How Leaky Is Your House?

Signs You May Have A Leaky House Beyond the purchase price of your home, your greatest investment might just be in the energy it takes to maintain it. The cost of heating and cooling a home in Wisconsin can be astronomical. The Badger State has extreme weather that perpetually takes its toll on our structures, and drafty houses that radiate heat and lose precious AC are all too common here. So, if your monthly energy bills are high, you are certainly not alone. Nevertheless, you might be surprised to learn that there are some very viable ways to improve your home’s energy efficiency. With the right roofing materials and insulation in place, you can solve the problem of an inefficient, leaky house and reduce that big bite out of your bank account to a mere nibble. So, just how leaky is your house? Here are some signs that may indicate you have a problem. The Presence Of Water Sometimes, signs of a leaky house can show up as a water leak. When your roof or other exterior materials have become compromised, water finds its way into the home through holes, crevices, and seams. Over time, those breaches become more pronounced and can cause serious damage. They can also cause excess humidity, mold, and bacterial growth, creating health hazards. And bear in mind that you may not even see water, as it can often show up as stains or warping on walls, ceilings, and floors. Of course, those same openings allow air to pass through. Ice Dams If you’ve noticed large sheets of ice accumulating on your roof during the winter or giant cascading clumps of icicles hanging off the gutters, that’s a sign of energy loss and a leaky house, too. A substantial amount of warm air is escaping from the roof, causing the melting and refreezing that creates those ice dams. Inconsistent Indoor Temperatures And Drafts If some rooms of your home feel toasty warm while others feel chilly or drafty, that’s another sign of poor energy distribution and a leaky house. You might even see signs of drafts around doors and windows, which are often the biggest culprits of all. Those curtains that appear to be moving on their own are surely not a paranormal event. A Noisy, Overworked HVAC System When your home leaks energy, this is often accompanied by the near-constant running of your HVAC system as it struggles to keep up and regulate those temperatures. If your heat or air conditioning seems to be continually kicking on and off, that’s a sign. (And it can shorten the life of that equipment and require more repairs too.) Excessive Noise If your previously serene home suddenly sounds like a day at the bird sanctuary, air rushing through dried-out or cracked weatherstripping may be the culprit. However, the sounds may be from actual birds whose chirping can enter through unknown openings. Out-Of-Control Utility Bills If your monthly energy bill seems to be consistently high and perpetually climbing, your leaky home isn’t just leaking energy, it’s leaking dollars. A Leaky House, By The Numbers Nearly half of your energy usage goes towards heating and cooling your house. On average, it’s a whopping 47% of your bill, compared to just 14% for your water heater, 13% for laundry appliances, 12% for lighting, and roughly 14% for everything else. Now, take a moment to consider that 47% again. If you have a leaky house, as much as 35% of that figure can be wasted energy. That’s a lot of precious money spent every year essentially warming up the clouds. The Path To Home Energy Efficiency There’s a better way to spend that money and one that can solve your energy loss problems. Roofing and insulation improvements can make a huge difference. It’s one of the best pathways to achieving energy efficiency, and it can give you a happier, healthier, and more comfortable house in general. And perhaps best of all, these improvements are an investment that pays for itself and continues to save you money. Furthermore, there doesn’t even have to be a significant out-of-pocket cost. Government incentives and tax credits are available to encourage energy conservation, making your roofing and insulation needs very affordable. The Smartest Choice For Your Roofing And Insulation Needs: Northern Generations Fixing leaky homes and attending to your home’s roofing and insulation needs are just a few of the things we do best. Taking advantage of those incentives is just smart, and smarter still when you choose Wisconsin’s leading roofing and insulation specialists to assist you. Northern Generations Construction provides complete and comprehensive construction services of the highest quality throughout the Southeast Wisconsin area. Contact us today for a quote or more information about our services.
The Unseen Hazards of Ice Dams
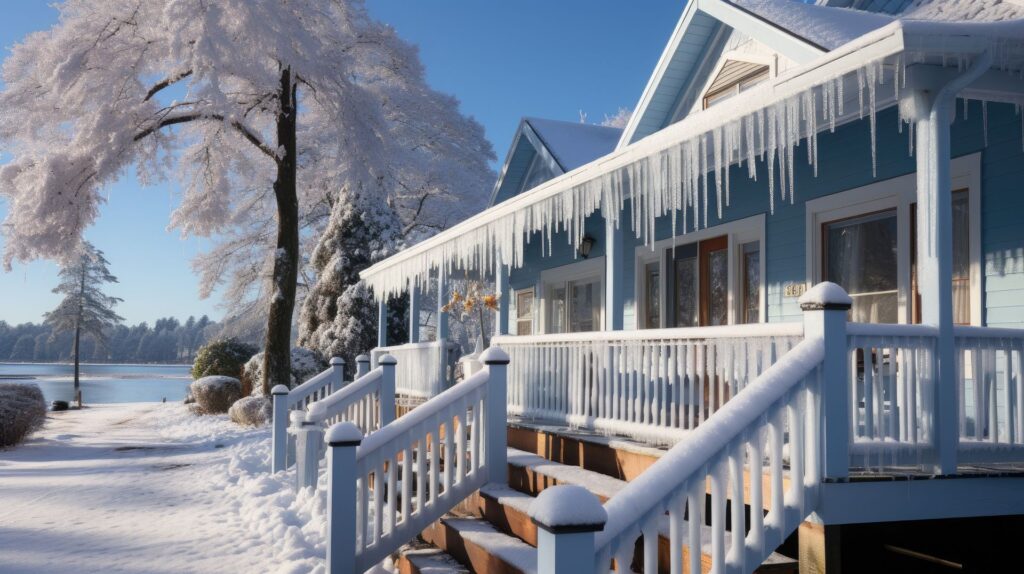
Guarding Against Ice Dam Damage In the serene, snow-clad landscapes of Southeastern Wisconsin, winter brings not just beauty but also a hidden adversary to homeowners: ice dams. Imagine a scene where a homeowner marvels at the icicles on their roof, unaware that these icy formations signal a more sinister issue. This is a common scenario in our area, where understanding ice dams is not just useful, but essential for home maintenance. Ice dams, though often overlooked, can cause significant damage to homes. Understanding Ice Dams An ice dam is a ridge of ice that forms at the edge of a roof and prevents melting snow from draining off. The science behind their formation is simple yet intriguing. It involves a combination of outside temperature, roof temperature, and snow on the roof. When warm air in the attic causes the snow on the roof to melt, the water flows down and refreezes at the roof’s edge, where it’s colder. This process creates a dam of ice, blocking further meltwater and potentially leading to serious problems. The factors contributing to the formation of ice dams are particularly prevalent. The region’s winter climate is marked by heavy snowfall and fluctuating temperatures – ideal conditions for ice dam formation. Additionally, many homes may not be optimized in terms of insulation and ventilation, exacerbating the issue. This is why our area is particularly prone to these icy troubles. Ice dams are a significant problem for homeowners, causing both costly repairs and extensive damage to homes. The primary issue with ice dams is their tendency to damage roofing materials, such as lifting and breaking shingles. This leads to gaps through which water can seep into the house. As a result, homeowners often face the challenge of fixing roof leaks, which can be an expensive undertaking. Damage From Ice Dams The weight is the first concern. As more snow melts and refreezes, they grows, adding considerable weight to the edge of the roof. This added weight can strain the structural integrity of the roof, particularly in older homes or those not designed to bear such loads. The average weight of an ice dam can be substantial, with just a small area of ice weighing hundreds of pounds. This stress can lead to gutters being pulled away from the roof, or in extreme cases, a partial roof collapse. The safety risks extend beyond the structural concerns. Falling icicles, a common feature of ice dams, can be dangerous to people and pets. Moreover, the attempts to remove ice dams without professional help can lead to accidents and injuries. The risk of water damage is a critical issue. When water pools behind the dam it can seep under shingles and into the home. This leakage can cause a variety of problems, such as stained ceilings, peeling paint, and damaged plaster. The most concerning issue, however, is the potential for this water to compromise the structural integrity of the house. Continuous exposure to moisture can weaken wooden beams and other structural components, leading to costly repairs. The moisture from these leaks provides a perfect breeding ground for mold and mildew. The growth of these fungi can lead to further degradation of the home’s interior. But beyond the damage to the property, the presence of mold and mildew poses potential health risks to the occupants. Exposure to mold can cause a variety of health issues, particularly for those with allergies or respiratory problems. Moisture also attracts pests like insects and rodents, seeking damp environments. These pests can further damage property and pose health risks, making ice dam prevention and repair crucial for homeowners. Professional Solutions to Ice Dam Problems Dealing with ice dams effectively requires a two-pronged approach: immediate remedies and long-term prevention. Immediate solutions can provide temporary relief. However, for long-term solutions, professional intervention is key. Professionals focus on the root causes of ice dams. This involves ensuring adequate insulation in the attic to reduce heat loss, improving ventilation to keep the roof temperature uniform, and using proper roofing materials and techniques to prevent water seepage. Technological advances, such as heat cables and improved insulation materials, have also become critical tools in the hands of these professionals. Preventative maintenance is essential in managing the risk of ice dams. Regular professional roof inspections, ideally twice a year, can help identify potential issues early. Homeowners should pay special attention to cleaning gutters and downspouts, as clogged gutters can exacerbate ice dam formation. Proper attic ventilation is another crucial factor. It helps to maintain a uniform temperature across the roof, reducing the chances of snow melting and refreezing at the eaves. Adding additional insulation in the attic can also minimize the amount of heat reaching the roof, thereby reducing snow melt. The expertise of professional roofing companies is invaluable in combating ice dams. Their experience in dealing with a variety of roofing issues equips them to provide comprehensive assessments of a home’s vulnerability. They can offer tailored solutions, considering the unique architectural features and location of each home. Northern Generation Construction, a reputable company in this field, specializes in providing such professional services. We understand the specific challenges posed by the Southeastern Wisconsin climate and are adept at offering customized solutions. Our expertise lies in identifying the underlying causes of ice dams and addressing them effectively, ensuring long-term protection for your home. Contact us today for an estimate.
How Professional Insulation Installation Transforms Your Living Space
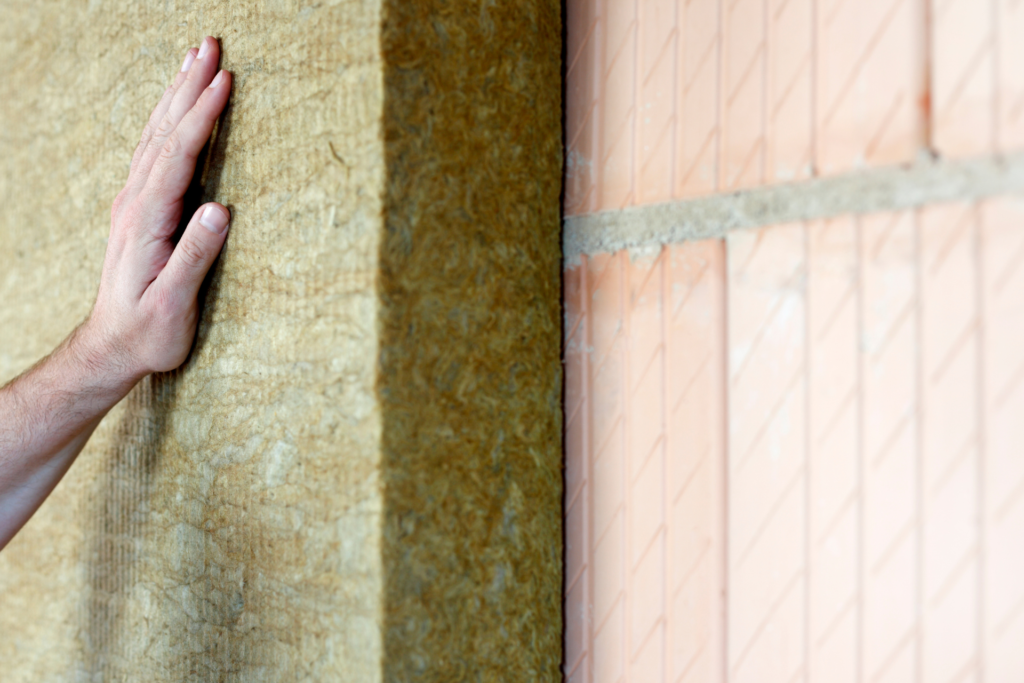
The Importance Of Insulation in Your Home Insulation plays a pivotal role in the comfort and efficiency of any home. While it may seem like a simple component tucked away in the walls, attic, or basement, the impact extends far beyond these hidden spaces. Proper insulation ensures a consistent indoor temperature, lowers energy costs, and even addresses issues like condensation and noise pollution. However, the effectiveness is not solely dependent on the material used; the method of installation is equally crucial. Opting for professional installation can make the difference between a system that merely performs and one that excels. Why Professional Installation Matters The method of installation holds significant weight in the overall performance and longevity of the system. While it may be tempting to consider do-it-yourself installation as a cost-saving measure, this approach often presents risks that can compromise the effectiveness. Poor installation can lead to gaps or inconsistencies that diminish its ability to control temperature, prevent moisture, and mitigate noise. Moreover, improper installation may necessitate future adjustments or replacements, leading to greater long-term expenses. Professional installation, on the other hand, ensures that the material is placed optimally to achieve the desired results. Experts in the field are well-versed in best practices for installing different types of insulation, allowing for precise fit and maximum performance. Additionally, professionals are equipped to navigate the challenges that often accompany installation, such as hard-to-reach spaces, potential for moisture buildup, and safety precautions. Homes with professionally installed insulation systems benefit from improved thermal performance, longer-lasting materials, and overall greater energy efficiency. Therefore, the choice of professional installation is not merely a question of convenience but one of quality and durability. The subsequent sections will delve into the multiple types available and the specific problems each can solve when installed by a qualified professional. Problems Associated With Poor Quality Or Poorly Installed Insulation Insulation serves multiple purposes, extending far beyond just keeping your home warm in the winter and cool in the summer. By addressing a range of issues commonly faced by homeowners, it improves both the comfort and functionality of your living space. Here, we explore the specific problems that proper insulation can effectively resolve. Firstly, one of the most evident issues is temperature fluctuation within the home. With adequate insulation, the indoor climate becomes significantly more consistent, eliminating the extremes of hot and cold. This consistency not only makes the home more comfortable but also reduces the burden on heating and cooling systems, thereby lowering energy costs. Secondly, it plays a crucial role in managing condensation and moisture. Inadequate insulation can lead to the buildup of moisture in walls, ceilings, and floors, fostering the growth of mold and mildew. Such conditions can deteriorate the home’s structural integrity over time. Professionally installed insulation acts as a barrier that controls moisture, effectively reducing the risks of mold growth and structural damage. Noise pollution is another problem that it can tackle. Acoustic insulation dampens the transfer of sound through walls and floors, making your home a quieter and more peaceful place to live. Whether it’s street noise, loud neighbors, or even sounds within your own home, it can significantly mitigate these disruptions. Lastly, proper insulation also has a favorable impact on the environment. By reducing the need for constant heating or cooling, it minimizes energy consumption and, consequently, reduces your home’s carbon footprint. This eco-friendly benefit is increasingly important as we collectively aim for more sustainable living practices. Different Materials And Their Benefits In the realm of insulation, various types of material are available, each with distinct advantages and applications. The choice of should align not only with the specific issues you wish to address but also with the area of the home where it will be installed. This section provides an in-depth look into different types, the benefits they offer, and the problems they resolve when professionally installed. Batt And Roll (also called blanket) in an insulations material type that comes in flexible fibers, typically fiberglass or mineral wool, and is available in pre-cut batts or long rolls that can be trimmed to fit. It’s commonly used between the studs, joists, and beams of building structures and is ideal for areas with minimal obstructions and standard spacing, providing effective thermal resistance. Material: Primarily made of fiberglass or mineral wool. – Particularly effective for controlling temperature fluctuations – Generally more cost-effective compared to other types – Problems Resolved: – Temperature Fluctuations – Noise Pollution – Ideal Locations: – Attics – Interior Walls Loose-fill insulation consists of small particles of fiber, foam, or other materials that conform to any space without disturbing structures. This type is particularly effective for retrofitting older buildings where it can be blown into walls or attics without much disturbance to existing finishes. – Capable of filling irregular spaces – Well-suited for retrofitting existing areas – Problems Resolved: – Condensation and Moisture – Temperature Fluctuations – Ideal Locations: – Wall Cavities – Unfinished Attic Floors Spray foam insulation, made up of polyurethane or polyisocyanurate, is applied wet and expands into thick foam that fits snugly in building cavities against air leakage. It comes in two types: open-cell foam which is spongier and closed-cell foam which is denser and adds structural strength, making it highly effective for thermal insulation and moisture control. – Offers high thermal resistance – Excellent for sealing gaps and preventing air leaks – Problems Resolved: – Temperature Fluctuations – Condensation and Moisture – Ideal Locations: – Under Roofs – Around Windows Made from polystyrene, polyisocyanurate, or polyurethane, foam board or rigid foam panels provide high insulation value with relatively little thickness. These boards are commonly used in unfinished walls, floors, and ceilings, and beneath siding and roofing materials, offering excellent resistance to heat flow. – Provides superior thermal insulation – Serves as an effective moisture barrier – Problems Resolved: – Condensation and Moisture – Environmental Impact – Ideal Locations: – Basement Walls – Exterior Walls Reflective or Radiant Barriers are designed to reflect heat away to reduce heating and cooling costs. Typically made of
Preparing Your Home For Stormy Weather
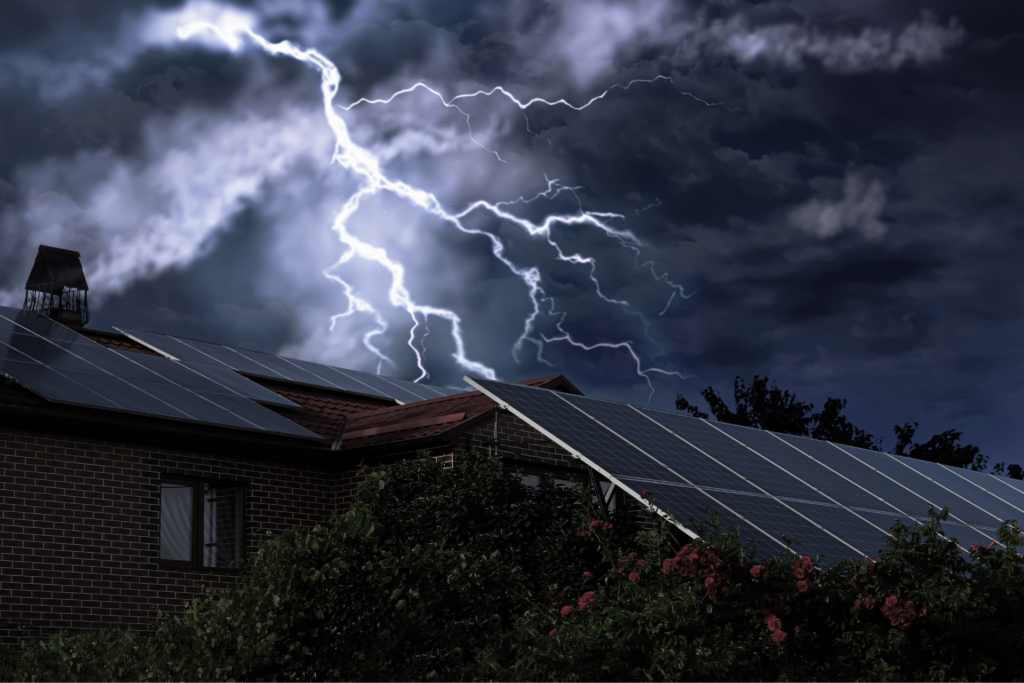
Preparing Your Home Or Business For Severe Storms When it comes to severe weather, preparation is key. For property owners, ensuring that your home or business is ready to face a storm can make the difference between minor repairs and catastrophic damage. As a company specializing in roofing and insulation services, we understand the importance of proactive measures to safeguard your property. Understanding Storm Threats Severe storms come in various forms; hurricanes, tornadoes, and hailstorms are some of the most destructive weather events, capable of causing extensive damage to roofs and insulation. Hurricanes bring heavy rain and strong winds, often leading to water intrusion and leaks. Tornadoes can rip apart structures with their powerful winds, while hailstorms can puncture roofing materials, causing immediate and long-term damage. Before the storm season arrives, it’s essential to assess your property’s vulnerabilities. Start with a thorough inspection, ideally conducted by a professional roofing contractor. Look for signs of wear and tear, such as missing shingles, cracks, or sagging areas. These weak spots can become entry points for water during a storm, leading to extensive damage. Next, examine your insulation. Proper insulation not only helps with energy efficiency but also plays a vital role in maintaining the structural integrity of your property. Insulation that is compromised can allow water to seep into your home, causing mold and weakening the structure. Addressing these issues before a storm hits can save you from costly repairs later on. During your assessment, pay attention to areas that are often overlooked. Roof valleys, the areas where two roof planes meet, are particularly prone to leaks and should be inspected carefully. Flashing, the metal strips around chimneys, vents, and skylights, can also deteriorate over time and need to be checked for any signs of damage or rust. By identifying and repairing these vulnerable areas, you can strengthen your property against the effects of severe storms. Strengthening Your Roof A robust roof is your first line of defense against severe storms. Investing in storm-resistant materials can significantly enhance your property’s resilience. Metal roofs, for instance, are known for their durability and ability to withstand high winds. Asphalt shingles designed for impact resistance can also provide additional protection against hail damage. Proper insulation is equally important. Quality insulation helps maintain the structural integrity of your property by preventing water infiltration. Spray foam insulation, for example, can create a seamless barrier that not only insulates but also adds an extra layer of protection against moisture. Consider also installing a roof underlayment, a water-resistant layer beneath your roofing material that provides an additional barrier against water infiltration. This can be particularly beneficial in areas prone to heavy rainfall and hurricanes. Additionally, ensure that your roof’s drainage system, including gutters and downspouts, is functioning correctly to prevent water from pooling, which can lead to leaks and structural damage. Securing Outdoor Elements Trimming trees and removing debris from your property can also prevent damage. Overhanging branches can break off during a storm, causing significant damage to your roof, windows, or even vehicles parked nearby. Regular maintenance and cleanup can minimize these risks and help ensure that your property remains safe. Additionally, disposing of accumulated yard waste can prevent potential hazards during high winds, reducing the likelihood of costly repairs and enhancing overall storm preparedness. Reinforcing windows and doors complements your roof’s protection. Storm shutters or impact-resistant windows can prevent debris from shattering glass, keeping your property safe and reducing the risk of injury during a storm. Consider using window film for an added layer of protection against shattering. For doors, particularly garage doors, ensure they are properly braced and reinforced to withstand high winds. Emergency Preparedness Plan Beyond physical preparations, having a well-thought-out emergency preparedness plan is crucial. Create an emergency kit that includes essentials such as water, non-perishable food, flashlights, batteries, and first-aid supplies. Ensure that all family members or employees are aware of the safety plan and know what to do in the event of a storm. Communication is key during emergencies. Develop a contact list that includes local emergency services, family members, and your roofing contractor. Having these numbers readily available can expedite assistance and repairs if needed. Documenting your property’s condition before a storm is also important. Take photos and videos of your roof, insulation, and other key areas. This documentation can be invaluable when filing insurance claims and ensuring that you receive the coverage you need for any repairs. Additionally, ensure that everyone knows the location of utility shutoffs, such as gas, water, and electricity. This can prevent further damage and hazards if the storm causes a breach or flooding. Establish a designated safe room or area within your property where everyone can gather during the storm, away from windows and external walls. Post-Storm Recovery Once the storm has passed, the first step is to assess the damage. Safety is paramount, so avoid going outside until it is safe to do so. Inspect your roof for any visible signs of damage, such as missing shingles, leaks, or structural issues. If you notice damage, contact a professional immediately for an inspection and necessary repairs. Professional contractors can provide valuable assistance with emergency repairs. They have the expertise to identify hidden damage that might not be immediately visible. Quick repairs can prevent further issues, such as water damage, mold growth, and structural weakening. Regular post-storm maintenance is essential to ensure the long-term safety and integrity of your property. Even if your roof appears undamaged, small issues can develop over time. Scheduling regular inspections and maintenance can help catch these problems early, ensuring that your property remains storm-ready. In addition to addressing roof damage, check for any issues with your insulation. Moisture intrusion during a storm can compromise insulation, leading to decreased energy efficiency and potential mold growth. Protect your home or business from the next storm with Northern Generations Construction. Our expert team provides comprehensive roofing and insulation services to ensure your property is storm-ready. Schedule your inspection today and secure your peace of mind. Contact Northern Generations Construction today.