Residential roof inspection is an important aspect that ensures the roof’s safety, roof lifespan, structural integrity, and the home’s overall health. To complete the first step of home maintenance, one needs to examine the components of the overall roof structure and the roofing materials, i.e., vents, gutters, shingles, and the internal structures. Whether the home complies with the building codes, whether a roofing contractor needs to be contacted, or even the extent of storm damage, typical of Wisconsin’s weather, are all answered by a residential roof inspection.
What is Roof Inspection?
Roof inspection is the methodical inspection of all the roofing components. The flashing, the drainage, the shingles, and the vents are all checked thoroughly during a roof inspection. It ensures that there is no water leakage, no signs of future problems, the safety of the home’s structure, and that the building is in compliance with the necessary codes.
Why do you need Residential roof inspections in Wisconsin?
The icy weather of Wisconsin is well known for causing roofing issues. Here’s why you should conduct regular residential roof inspections
- Spotting ice dams and weight damage early on
- Identifying the cracks from freeze-thaw cycles early and understanding future damage
- Assessing the damage from hailstorms and strong winds
- Examining compliance with the building codes
- Detecting ventilation or moisture buildup issues early on
- Maintaining the lifespan of the roofing materials.
Benefits of roof inspections in Wisconsin
Early detection and prevention
Identifying and handling issues caused by Ice dams, freeze-thaw cycles, and storms promptly prevents the immediate damage from worsening
Preemptive measures specific to the locale/structure
Pinpointing the recurring issues helps in understanding which preemptive measures should be taken specifically in the area or the structure.
Underlying issues and successful detection
Regular roof inspections and the patterns found can indicate underlying issues that may be affecting the building’s structure, such as rot or mold, and take action.
Cost efficiency
Regular inspections maintain the optimal health of the roofing components. Which translates into both preventing the excess cost of energy during the extreme weather and the recurring cost of future repairs.
Ensuring the roof’s lifespan
Taking prompt action, whether it’s to prevent damage from occurring or worsening, mitigates the pressure on the roof’s structure. Making sure that the roof’s lifespan is not compromised
Residential roof inspection checklist for Wisconsin
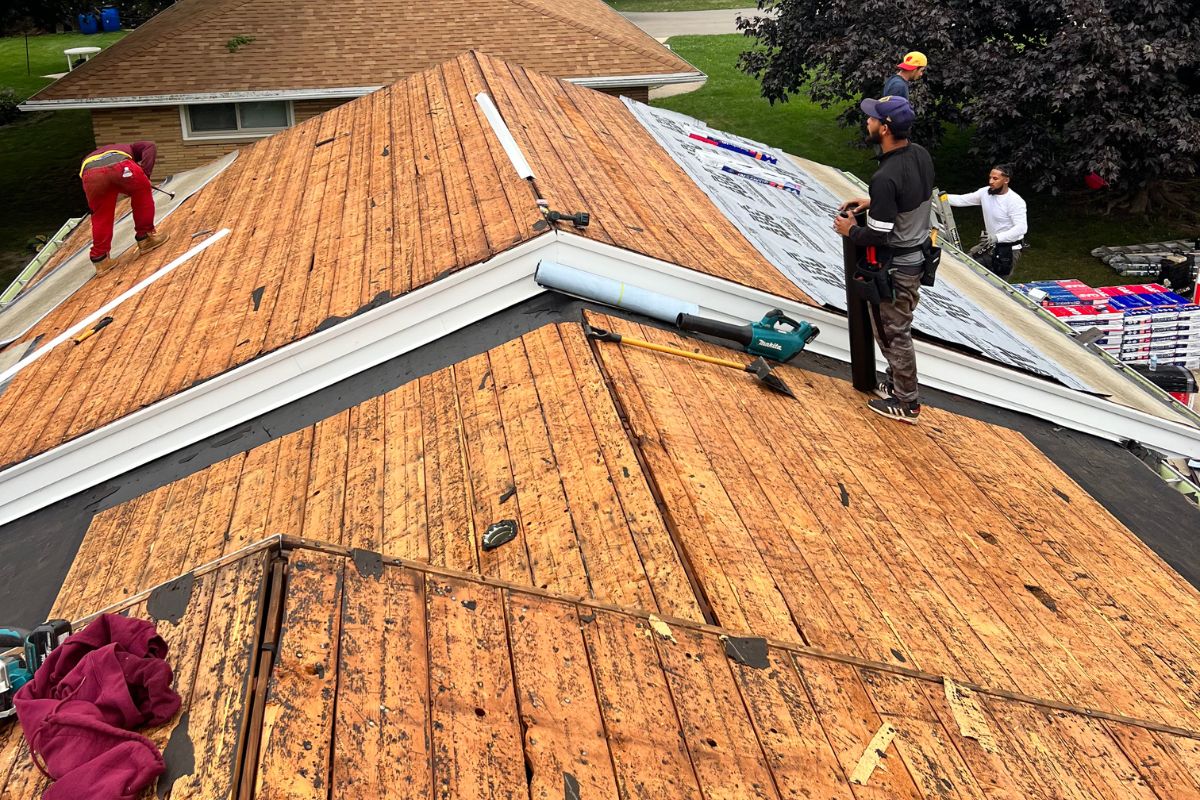
Roof decking and sheathing
Look for signs of sagging that may have occurred from exposure to water. Check for signs or cracks, or light coming through
Insulation and ventilation
Inspect for mold and excessive moisture to check the efficiency of the ventilation and insulation depth
Water leakage and rust stains
Look for water stains, wet spots, or disclosed drip spots occurring from water mixed with rust and small debris
Shingle health
Check whether the shingles are overly cracked, curled up or missing largely in a particular area. There might be indications of an underlying problem, discoloration or black spots on shingles are often caused by mold growth ot rot of the structure
Underlying issues
Lift the shingles to check for signs of loosening and possible issues on the underlayment
Flashing and seals
Check around the roofing components, such as chimneys, vents, and skylights, to find signs of leaks or rust and make sure they are secure.
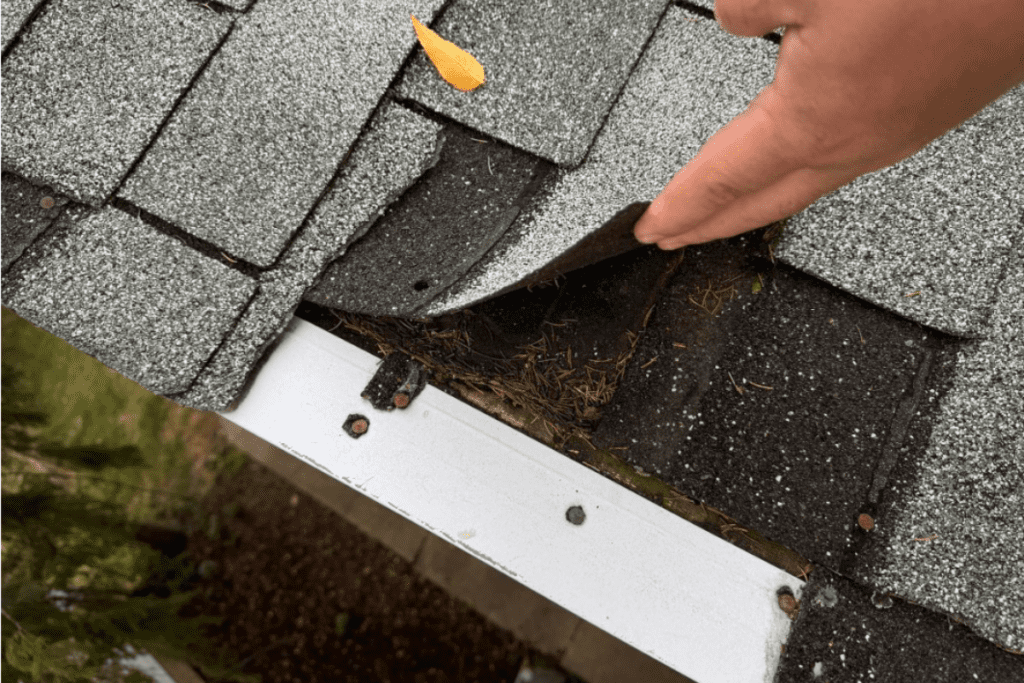
Gutter and drainage
Inspecting clogged gutters and clearing the pathway from debris is necessary. Make sure that the water flow is not hampered in any way
Vents
Make sure that the vents are not obstructed by debris or ice and are sealed properly
Obvious signs of damage
Mark areas with hail damage, exposed nails, or apparent deformations to keep a check.
Clearing trees
Check whether there is an overgrowth of trees harming the health of the roof. Tree branches need to be approximately 10 feet away from the roof, optimally
How to Perform a House Roof Inspection
Preparations and safety
- Reviewing past documents: Collect and look through the previous inspection reports, logs, mandated building code, and guidelines provided by the roof manufacturer to set up a proper plan and identify key points to focus on
- Conduct a safety briefing: ensure safe protocols such as protection harness, anchoring points, hard-grip boots, sturdy ladders, etc
- Assemble toolkit: collect and check the necessary equipment. Make sure the equipment is properly calibrated. Common tools are an infrared camera, a moisture meter, binoculars, soapstone, chalk, a high-resolution camera, a probe knife, etc.
Ground-level reconnaissance
- Visual scan of the roof: walk the perimeter at a 10-foot distance to take note of granule condition, signs of moss or algae, fascia health, etc. Use binoculars to check chimneys, flashing, vents, etc.
- Take photos: take wide-ranging photos of the roof from all necessary angles and label them according to orientation(North, South, East, West)
Client walk-through and briefing:
- Presentation: stand at a proper distance and explain the inspection process step by step. Clarify all the key terms
Check interior
- Check the basement: inspect the foundations and look for possible cracks. Monitor for basement/crawl space leaks
Set up access and ladder
- Position the ladder: Place the ladder at a 4:1 ratio in an area that is clear of debris. Ensure that the ladder is firm and tie off the ladder 3 rungs below the roofline.
Verify the edge and underlayment
- Conduct a drip edge test: Conduct a drip test by lifting 3 to 5 shingles to confirm continuous underlayment
Manual roof walk and drone survey:
- walk the roof following a grid pattern while focusing on the ridges. Check to see cracks, deterioration, formation, or invasive growths
- Use drones to survey the inaccessible or steep spots.
Assess for wind and hail damage:
- Randomly lift shingles to check for loosening in 10 random spots. Keep a note of any issues.
- Conduct a chalk test to find dents from hail damage. Mark with soapstone and take photographs with a scale.
Valley and flashing inspection:
- Look for splits, rusts, and soft spots on valleys. Use a moisture meter at seams to inspect water leaks.
- Check flashings for caulking failures, sealant blackouts, and rust.
Markings and logs:
- Mark and label each damage type with soapstone
- Keep a log of the accessories
Check the attic and fixtures:
- Check insulation depth and ridge vents for air flow irregularities
Debriefing and reporting:
- Categorize items based on safety hazards and maintenance suggestions
- Prepare a photo-annotated report for the client
How to Perform Apartment Roof Inspections: Multi-Unit Property Considerations
Preparation
- Conduct a review of the past documents. Collect building plans, past inspections, and maintenance records, etc.
- Ensure that the tenants are aware of the scheduled inspections to ensure coordination and avoid disruptions.
- Safety measures must be checked and rechecked thoroughly
Exterior Inspection
- Check lines, shingles, and membranes for external damage
- Inspect the flashings and seal by checking the chimneys, vents, skylights, etc
- Make sure the gutters and downspouts are not clogged and working efficiently
- Examine external installations such as antennas, HVAC units, etc
Interior Inspection
- Look for signs of water leakage through water stains, rust stains, discolorations, etc.
- Check the attic for insulation issues and possible leakages
Documentation
- Take photographs as documents of all the evidence found
- Prepare a report categorizing suggestions based on repairs needed and maintenance
Follow-Up
- Coordinate with the contractors to ensure proper repairs
- Make a schedule for the next inspection
What does a roof inspector do?
- Documentation of insulation health and moisture level
- Examination of roofing components such as shingles, flashings, gutters, etc.
- Inspection of hidden damage or issues through professional equipment
- Conducting external damage tests, such as hail damage.
- Making proper logs of relevant information.
- Providing detailed and efficient reports with maintenance suggestions

How Often Should You Inspect Your Roof?
A homeowner in Wisconsin should have their home inspected 2 times a year.. After spring and before winter, as well as after a heavy storm or hail damage. Seasonal checks help identify cracks, leaks, and missing shingles well before they get a chance to worsen.
How Much Does a Roof Inspection Cost on average?
| Type of inspections | Average estimated costs | Details |
| Basic visual inspection | $75-$200 | Ground and roof edge survey |
| Drone-assisted inspection | $150-$400 | Aerial imaging for more coverage. Especially in inaccessible parts |
| Infrared Moisture Scan | $200-500 | Used for detecting thermal leaks that may be a result of compromised insulation |
| Comprehensive report and testing | $250-$600 | Thoroughly check the Attic |
| Commercial inspection | $500+ | Depending on the set requirements |
How Are Roofing Inspections Performed?
- Check from a proper vantage point on the ground with binoculars
- Ensure the sturdiness of the ladder and other safety measures before climbing up
- Walking the roof while manually inspecting.
- Conduct a lift test to check loosening from wind, and a chalk test for hail damage
- Use professional equipment such as a moisture meter and an infrared camera as necessary
- Access the attic to check for possible water leaks and mold growth
- Make a detailed and photo-rich report with inspection software.
Can I do my own roof inspection or hire a contractor?
While homeowners can conduct basic inspections such as looking for cracked to broken shingles, apparent water leaks, and sunlight entry points, professional contractors are needed for a thorough inspection. Licensed contractors have access to the equipment and tools, and homeowners are not well-experienced with the building codes, which homeowners are not.
Do you think you still need a roofer’s help to inspect the roof? Contact Northern Generation, the best local roofing contractor, for your roof inspection. We have been in the industry for 30 years, and we do every inspection to identify whether you need roof repair or replacement.